Adaptive Reuse in Interior Architecture: Sustainable Design That Redefines Old Spaces
🏗️ Breathing New Life into Old Spaces: The Power of Adaptive Reuse in Sustainable Interior Architecture
Intro
In 2025, sustainability is no longer an optional design choice it’s a design responsibility. From green buildings to carbon-neutral interiors, the focus has shifted toward re-imagining what already exists rather than endlessly creating new structures.
This approach is known as adaptive reuse the art and science of giving existing buildings a new purpose while respecting their history, structure, and character.
It’s a concept deeply rooted in The Fundamentals of Interior Architecture, where John Coles and Naomi House describe the interior architect’s evolving role as one that bridges past and present, heritage and innovation. Adaptive reuse is where architecture becomes truly circular where the walls already built continue to serve, evolve, and inspire.
What Is Adaptive Reuse?
Adaptive reuse, sometimes referred to as remodeling, is the process of repurposing an existing building for a new function.
For example:
- Converting an abandoned factory into a cultural hub,
- Turning a colonial mansion into a design studio, or
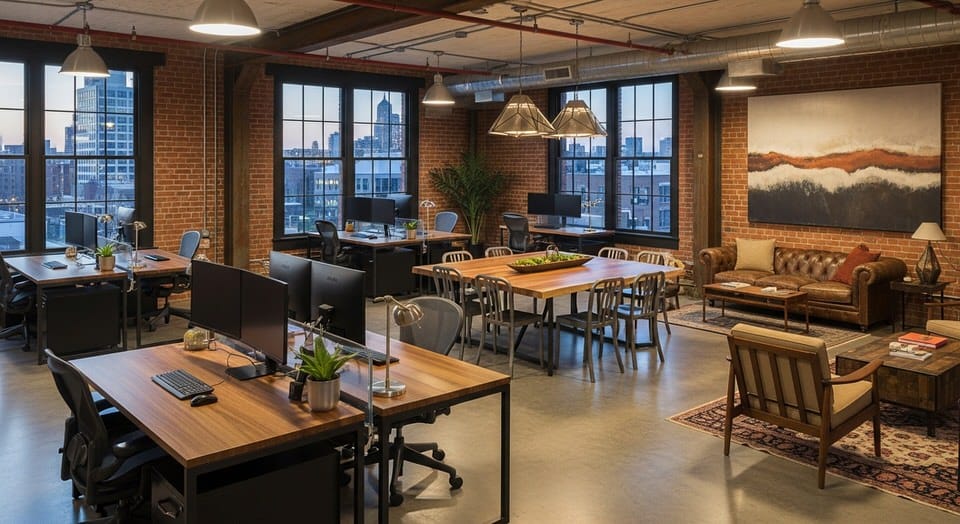
- Transforming an old railway warehouse into a co-working space.
Rather than demolishing the structure, adaptive reuse allows designers to retain the embodied energy of the building the energy that went into its original materials, transportation, and construction while reconfiguring it to serve today’s needs.
The Four Technical Approaches to Building Reuse
According to The Fundamentals of Interior Architecture, the reuse process falls into four major categories, each involving distinct design logic and technical challenges:
- Preservation | Maintaining the building in its current condition, protecting it from further decay. Ideal for historically significant structures where change would diminish authenticity.
Example: Stabilizing an old fort or temple ruin without altering its form. - Restoration | Returning the building to its original form using period-specific materials and methods. It’s about respecting the craftsmanship and construction language of the past.
Example: Restoring a 19th-century courthouse with lime plaster and hand-carved wooden moldings. - Renovation | Updating the structure for modern living while keeping its original function intact.
Example: Renovating a mid-century home with upgraded HVAC systems and energy-efficient glazing. - Remodelling / Adaptive Reuse | Assigning a completely new function to an existing building, often requiring structural, material, and environmental modification.
Example: Converting an industrial mill into a contemporary art gallery.
Among these, adaptive reuse is the most forward-looking it combines creative design with sustainability science, making it highly relevant in today’s architectural climate.
Technical Considerations in Adaptive Reuse
Adaptive reuse projects are complex because they blend new technologies with old structures. A designer must think like both an architect and a conservationist.
1. Structural Analysis
Before intervention, a detailed structural audit is carried out. Engineers analyze:
- Load-bearing capacity of existing beams and walls,
- Material degradation (moisture, rust, fatigue),
- Foundation stability, and
- Potential for adding mezzanine or suspended floors.
This phase determines whether the structure can safely accommodate new loads, layouts, or mechanical systems.
2. Environmental Performance
One of the strongest technical arguments for reuse is carbon savings. Studies show that reusing a building can save up to 50–75% of its embodied carbon footprint.
Designers employ Life Cycle Assessment (LCA) tools and BREEAM/LEED rating systems to quantify sustainability. Key elements include:
- Low-VOC finishes and adhesives
- Recycled or reclaimed materials (brick, timber, steel)
- Natural ventilation and daylight optimization
- Upgraded insulation to reduce heating/cooling loads
3. Building Services Integration
Adapting a building also means integrating modern MEP systems (Mechanical, Electrical, Plumbing) without compromising its heritage features. Designers often:
- Route cabling and ductwork through false ceilings or raised floors,
- Use wireless automation systems for lighting and security,
- Employ heat-recovery ventilation units in heritage shells to maintain comfort and air quality.
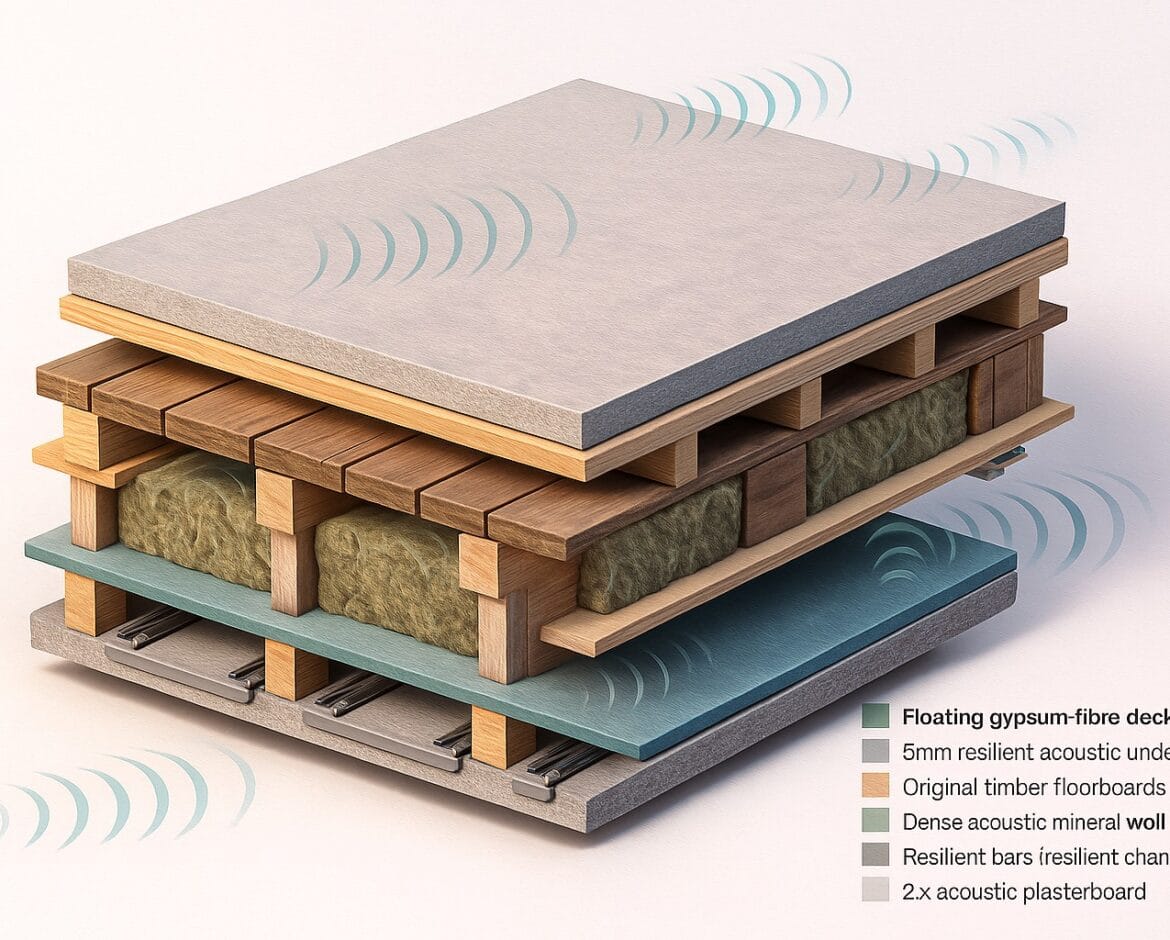
4. Acoustics and Lighting
Old buildings often have high ceilings and reflective surfaces. Acoustic engineers model RT60 reverberation times to specify materials like perforated wood panels or acoustic baffles.
For lighting, daylight factor analysis ensures even distribution, while LED tunable white systems create adaptive ambiance for different uses exhibition, office, or hospitality.
Design Philosophy: Marrying Old and New
The challenge and beauty of adaptive reuse lies in balance. The designer must let the building’s story remain visible, while making it usable for contemporary life.
Architects like Carlo Scarpa and Foster + Partners have set benchmarks in this balance.
Scarpa’s work at the Castelvecchio Museum in Verona is a masterclass in material contrast raw concrete beside ancient brick, bronze detailing beside stone.
Foster’s renovation of the British Museum’s Great Court shows how light, structure, and technology can reinterpret history without overwriting it.
The principle is simple yet profound:
“Don’t erase history - let it evolve.”
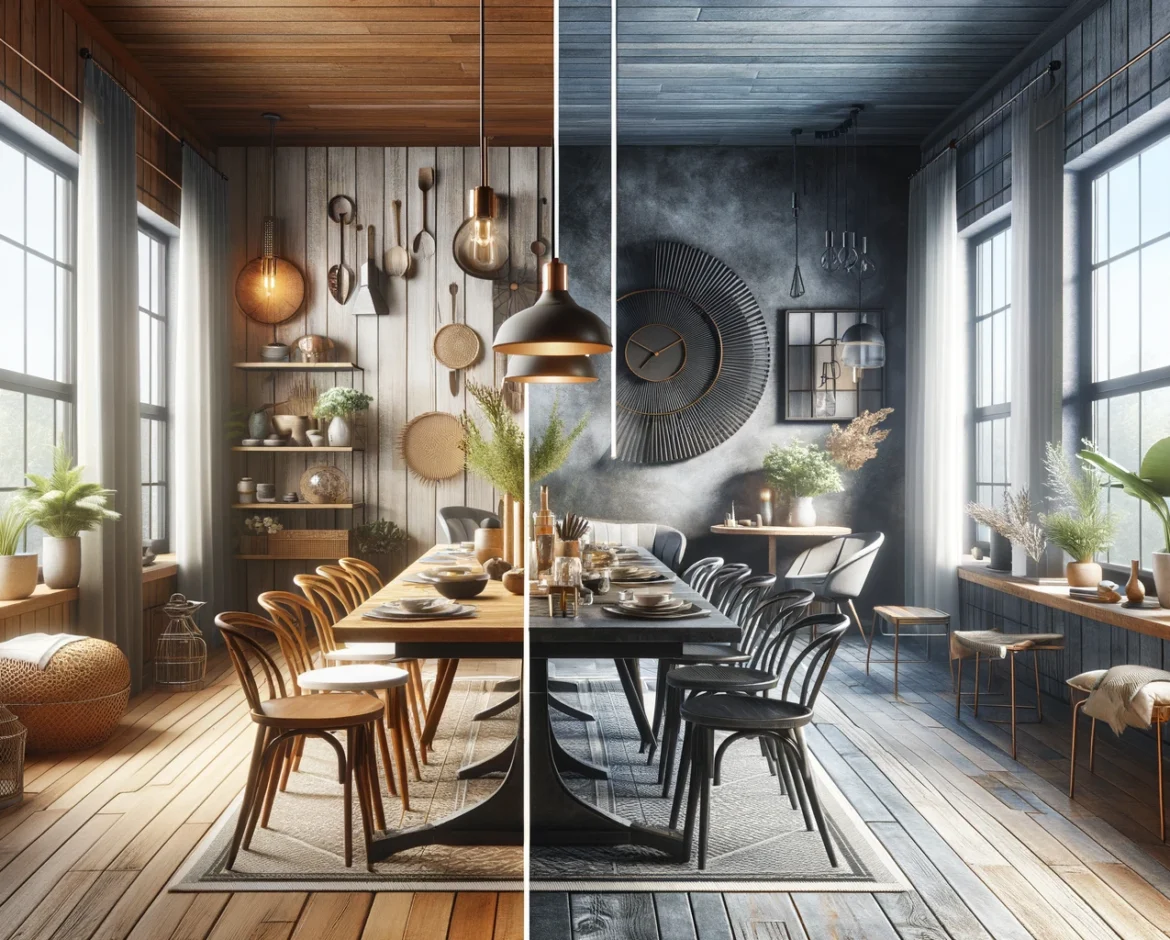
Sustainability as Aesthetic
Adaptive reuse isn’t just sustainable in metrics; it’s also aesthetically sustainable. The wear of old materials, the patina of time, and the juxtaposition of raw and refined surfaces tell stories that no new construction can mimic.
Trends like industrial minimalism, exposed brick walls, and steel-glass hybrids all originate from this philosophy. They speak to a generation that values authenticity over perfection a mindset that dominates both Google searches and design sensibilities today.
Looking Ahead with Closing Remarks
Adaptive reuse is not just a design strategy it’s an environmental revolution.
It preserves the memory of a place while pushing it toward the future. For a generation that values authenticity, sustainability, and smart design, this is more than a trend it’s the new architectural normal.
Because sometimes, the greenest building is the one that already exists.
🔹 Have a heritage property or unused building?
Contact our Artilett Design Team to transform it into a sustainable modern space beautifully, responsibly, and smartly.